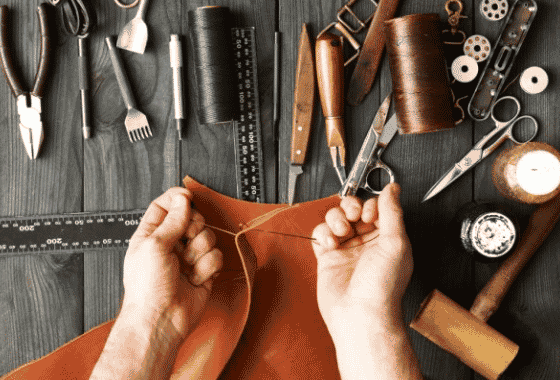
Whether you want to make something cool out of leather for yourself or as gifts for your friends and family, you will enjoy this creative hobby! Leather can be used to make shoes, clothing, artisan handcrafted leather bags, book bindings, fashion accessories, belts, flower leather craft, jewelry, furniture and much more. Some people even enjoy replicating Indian leather craft and Viking leather works.
To get started in leather carving for beginners, you will need a small set of specialty design tools, along with leather, of course. To name a few, the tools you will need are a: swivel knife, beveler, sewing pony horse clamp, hollow hole punch, and hammer. As you get more advanced and enthusiastic with this hobby, you will likely add to your tool collection. Below is some helpful leather working 101 information to help you starting leatherworking.
Leather
First, we will start with the leather. Leathers come in all different shades, thicknesses and sizes, depending on what you plan to make. Leather also comes tanned in several ways, most commonly: vegetable tanned, chrome tanned, aldehyde tanned, brain tanned (real animal brain oils!), and alum tanned. The most natural and oldest method is vegetable tanned, which is also the most eco-friendly. If the tanning process is important to you, be sure to do your research before buying.
When you get started, if you want to design and decorate the leather, you’ll need to moisten the leather with water and a sponge prior to working on it. This allows the leather to be pliable and accept and retain the damage you do when you carve your design into the leather. It also allows for a smoother, more professional look. If you are just wanting to make a belt or basic purse, you may be able to get away without moistening it as long as the leather is pliable enough for you to do what you want.
| Product Image | Product Name | Product Link |
 | Cow Hide Leather in various colors | See on Amazon |
 | Leather Suede Lace | See on Amazon |
 | 20 Piece Sewing Needles and Waxed Thread | See on Amazon |
 | Leather Scraps | See on Amazon |
Tools
Once you have chosen what type of leather craft you want to make, the next step is to decide if you want to decorate it or not. If so, there are endless designs that you can create with some basic tools. Leather jewelry is big these days, so the tools below are the same as leather jewelry making tools. You can find all of these leather tools online.
Rivets: Metal pieces that allow you to attach two or more pieces of leather together or used as decorations.
Chisel: Creates holes for stitching and requires a punch all the way through the leather and is quicker than using a pricking iron.
Punch: Punches holes in the leather and can range from about 1mm to 6mm.
Stamps: Alphabets, animals and symbols are the most common stamps. Make sure you use a hard surface and the leather is properly moistened. Use a mallet and make short, strong hits on the stamp to make the imprint but not so hard that you cause the stamp to bounce, as this can create multiple impressions of your design.
Beveler: Round the edges of the leather (edge beveler) or create designs (figure carving beveler), including inverted leather carving.
Clamp: Holds the leather to help with accurate stitching, cross stitch leather, cutting or punching. Sometimes called a leather clam.
Hammer: Also called a mallet or maul. Used to hit the punching or design tools. Make sure you don’t use steel or metal hammers on your tools, as they may cause them to bend or break. You may need several different weighted hammers depending on the design and leatherwork.
Cutter: Used to cut the leather. You can use many things, like swivel knives, skiving knives, curved knifes, leather shears and rotary cutters.
Finishing Touches:
To finish off your project and make it look super professional, you can burnish the leather edges, which is basically polishing the rough edges of the leather, or use edge paint, which is better for soft, thin, more pliable edges. It may be time consuming depending on the size of your project, but it is well worth it!
Once you’re done with your design and burnishing or edge painting, you can apply a leather finish to preserve the quality and appearance of your piece. Make sure the surface is completely dry and clean prior to applying the finish. This is the same if you think you need a second coat, too.
If you want some additional reading or tricks and tips to leather crafting, here are some books to check out.
Now that you have the basic leather working 101 skills, you can become a custom leather carving master! Happy leather crafting!


